Dienstag, 13. November 2012

openSUSE on CuBox (Day 3)

My CuBox uses very very little power, which makes it ideal for my use as a NAS server. So it sits here on my desk 24/7 and is "always on". That's why I started today pretty much where I left off yesterday - with openSUSE 12.2 running on the CuBox, but pretty much unconfigured.

YaST works quite well on the CuBox. It didn't have all the modules installed that I typically need, but all modules are available for installation and are only a quick zypper install yast2-<module> away. Here's a video I recorded for example's sake - I use the YaST samba client module to change the group membership.


Other than that, I didn't get around to doing much with the CuBox today. I still haven't found any serious bugs that stop me from using openSUSE 12.2 as a production NAS. My samba setup is back up and running and the CuBox is successfully exporting the contents of my NTFS formatted external USB drive (note, you'll need the ntfs-3g package in order to do this - luckily this is also just a zypper in away).

I'm now looking into (re)building the openSUSE image for CuBox using kiwi and the Build Service. I'd like to make the boot process work out of the box, so the workarounds described yesterday aren't needed anymore. On the other hand, if this image is as stable as the debian image I had deployed since last year, I may not need to boot again...

Montag, 12. November 2012

openSUSE on CuBox (Day 2)

I blogged a couple of days ago about how there is an openSUSE 12.2 image for the CuBox and how I wasn't getting past the line that stated something like "loading kernel". Well, after some time on the #opensuse-arm channel and some help from mmeister there, the CuBox has now really lifted off on openSUSE.

So, what is needed to get the CuBox up and running on openSUSE? Here's the juicy stuff (first connect up your serial connection with screen /dev/ttyUSB0 115200 and hit any key on startup to stop autoboot and to get into the uboot command prompt).

setenv kerneladdr 0x2000000
setenv ramdiskaddr 0x3000000
mmcinfo
ext2load mmc 0:1 $kerneladdr boot/linux.vmx
ext2load mmc 0:1 $ramdiskaddr boot/initrd.uboot
setenv bootargs "console=ttyS0,115200 root=/dev/mmcblk0p2"bootm $kerneladdr $ramdiskaddr

That should work for you and you should now be looking at openSUSE booting. There are a couple of interesting points to observe though - probably issues that need attention:

1. ext2load mmc 0:1 $kerneladdr boot/linux.vmx takes a long time
2. ext2load mmc 0:1 $ramdiskaddr boot/initrd.uboot takes ages (a minute)
3. once past that, booting itself takes a long time too

Other than that, the first thing that happens after booting is that you get landed into YaST - a very ugly YaST as the colours don't seem to work properly through screen. You get to choose your keyboard layout and language (works), your timezone (works) and you get to set up the root password and configure a local user (works).

As DHCP was automatically set up, you can check your ip address with ifconfig and try to log in through SSH - this is way more comfortable than messing about through the serial console.

So, the next things that need to be done (IMO) are:

1. see can we get a working boot.scr (i.e. so the above workaround isn't needed)
2. check to see if memory is being reserved for graphics (if so, stop this)
3. see if we can sort out the missing update repo

Freitag, 9. November 2012

openSUSE 12.2 on CuBox (Day 1)

On November 6th (2012) Jos announced openSUSE 12.2 for ARM. Devices like the BeagleBoard and PandaBoard are "officially" supported. Some other boards, including the CuBox are supported as "best efforts".

To get started, I had a look at the Wiki pages over on the Solid Run site. I noticed that there were entries for Fedora, Ubuntu and Gentoo etc under "Linux Distributions", but no entry for openSUSE (except that the wiki pointed out that Solid Run donated hardware to openSUSE - which they did). I figured that I might as well get a wiki page for openSUSE started. I copied the basic download and installation information from http://en.opensuse.org/HCL:CuBox and added some more information on how to get started as an openSUSE ARM developer/packager.

My own CuBox has been in action as a NAS server for almost a year now. Up until tonight, it was running on Debian. I never had a single issue with it - it ran the bones of twelve months without crashing once. An occasional apt-get update and apt-get upgrade kept it up to date and never caused grief. Thus, it was with a certain degree of apprehension that I decided to give openSUSE a spin.

To get a linux distribution "installed" on a CuBox all you really need to do (for a supported distribution) is to copy the distribution image to a micro SD card, stick the card in the CuBox and reboot - preferably watching the whole process on a connected serial console - using e.g. screen /dev/ttyUSB0 115200.

I first downloaded the appropriate openSUSE image (see http://en.opensuse.org/HCL:CuBox) and extracted it and dd'd it to the SD card as instructed. I stuck the SD card in the CuBox and started tracking the goings on of the bootloader through screen. I noticed pretty much immediately that not all was well in openSUSE land on CuBox. There were a series of nasty looking error messages, but it did look as though the bootloader finally found the linux kernel image, decompressed it and tried to boot from there. That's where nothing else worked. It is currently hanging at the "booting linux" statement.

Out of interest, I flashed my backup debian image to a different SD card and booted up on the CuBox. It booted as expected and got me into a root shell within seconds.

Thus, I anticipate a deal of debugging of the openSUSE image over the next couple of nights. Of the error message I did see, the ones relating to "kerneladdr" not defined and "ramdiskaddr" not defined seemed most serious.

You can have a look at the boot process here: http://pastebin.com/hHxiZJ5C

Montag, 2. Januar 2012

Electronics 2012

Gadgets I'm interested in at the moment
Going into 2012 there are a couple of electrical gadgets that I've got my eye on, for one reason or another. Here they are:


Raspberry Pi
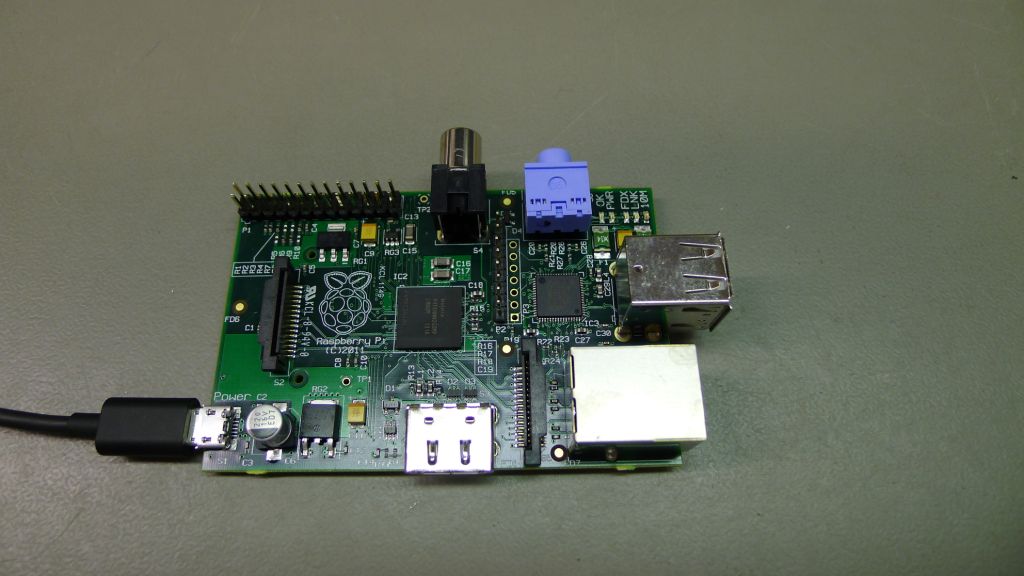
These are little boards from the Raspberry Pi Foundation - a UK based non-profit. There are going to be two boards. The simple one will cost about $25 and the more expensive one will be $35. That will probably actually be in Euros by the time these things get into production. The simple board is missing e.g. network. The more expensive $35 board is quite interesting. It has HDMI, 10/100 network (it's a real pity that it doesn't have Gigabit Ethernet) and USB. There's an ARM (6 I think) running on the platform. It also has plenty of GPIO pins. At $35 it's definitely worth having.

CuBox
Now here's a box worth having, if it ever materialises. According to the website it has:
  • Linux based distributions like Ubuntu, Debian and others
  • Android
  • 800 MHz dual issue ARM PJ4 processor, VFPv3, wmmx SIMD and 512KB L2 cache.
  • 1080p Video Decode Engine
  • OpenGL|ES 2.0 graphic engine
  • HDMI 1080p Output (with CEC function)
  • 1GByte DDR3 at 800MHz
  • Gigabit Ethernet, SPDIF (optical audio), eSata 3Gbps, 2xUSB 2.0, micro-SD, micro-USB (console)
  • Standard Infra-red receiver for 38KHz based IR controllers.
  • No JTAG required. Unbrickable for Developers (**)
That's quite an impressive list. The fact that it can do hardware decoding, has Gigabit Ethernet, eSATA and HDMI means that this little guy looks like the ultimate mediabox. It can run XBMC but IMHO that could be a bit of a waste. At a bit under €100 I'd expect more than just XBMC from it. The good news is that it looks like the openSUSE ARM effort is now advanced enough that it might be possible to run openSUSE on the CuBox. Time will tell. The thing has to actually ship first.

Mittwoch, 26. Oktober 2011

Making the seeeduino stalker (v1) work with avrdude and a Makefile

I got one of these Seeeduino Stalker v1 boards recently, for $22 as they were having a fire sale on them over on Seeeduino Studio to make way for version 2.0. The board carries an Atmel 328 and has an RTC chip plus a micro SD card already soldered on.


When I got the board, I got an UARTSBee programmer to go with it. This is basically just a USB to Serial adapter (FTDI chip). I got the version 4.0 board which unfortunately has 6 pins outgoing, which makes it incompatible with the 5 pin input of the Stalker. It is, however, easily possible to solder 5 pins onto the holes provided directly behind the 6 pin output. Then the programmer can be stuck straight on to the Stalker's input port.

To get started with programming the Stalker I downloaded the arduino software from the CrossAVR repository on the openSUSE build service. This is a java based GUI which simply provides an editor for text files and uses gcc to compile and avrdude to upload the software to the arduino (the Stalker). Using the arduino GUI was quite easy and uploading worked without a problem.

However, I wanted to use a standard Makefile and avrdude to flash the software to the Stalker. This turned out to be a bit more complicated than I thought because the arduino GUI knew that it was necessary to pull the DTR before flashing the software. This had the effect of resetting the Stalker, putting it into the bootloader. Only then will the Stalker accept a firmware flash. What confused me was that by running strace on the arduino GUI I saw that it was calling avrdude with -p stk200v1. When I tried this directly with avrdude it didn't work (because avrdude wasn't pulling on the DTR line to reset the Stalker so it would spring into the bootloader and accept a flash). It turns out that avrdude has already thought of this and provides a -p arduino option. Using this worked out of the box. Below is a video of the Stalker with the UARTSBee programmer stuck on vertically. Attached to it is a breadboard with some LEDS just to show the pins set to output and blinking.


Dienstag, 18. Oktober 2011

bundesliga2go with mongodb, zeromq, gevent, web.py and websockets

bundesliga2go (switch to mongo branch) is a project which I started with Vlad so that we could look at the german Bundesliga results on a smartphone. It was originally our Hackweek 6 project. The results are provided by the webservice available at OpenLigaDB. They are provided in XML format.

The first thing we noticed was that it was going to be difficult and slow to just write a mobile web client which would query OpenLigaDB every time that a result or update was required. That is because when matches are in progress (typically Saturday at 15:30 german time) OpenLigaDB can be quite sluggish. Also, it seemed ridiculous to query already available and final results over a live internet connection with a mobile phone. On top, it can get expensive. We figured we could provide a better solution using modern smartphone browsers' offline mode.

So, the first thing to do was to cache the responses from OpenLigaDB. This was done by creating a suds (SOAP client for Python) synchronise script which simply asked OpenLigaDB for match data and stored this in a SQLite database. We then created an API (Python) for accessing the local database and for ensuring it was kept up to date with OpenLigaDB (we used APScheduler to schedule updates), especially when matches were in progress. The mobile client frontend was done with jQuery mobile. The actual web server itself was done with web.py.

Before long it became apparent that SQLite (or any relational database) might not be the most appropriate storage solution. The kind of data we were storing was more suited to a document type storage form so we moved to mongodb. This was helpful because we could now use techniques such as map/reduce to quickly compile the Bundesliga table and top scorers.

We implemented a first working draft by having the web.py server return JSON to the mobile browser. The browser stored the data using localStorage. This meant that it was only necessary to talk to the web.py server when updates were requested. Obviously, we needed to get around the security fence that browsers erect around remote JSON. We thought about using jsonp to do this but that seemed clumsy. What we came up with was CORS - the client first sends a HTTP OPTIONS request to the web.py server. The server authorises the client to use JSON returned over standard GET or POST and the client follows up immediately with the actual GET/POST request whereupon the web.py server returns the JSON data. The client then parses, stores and displays the data.

This worked fairly well until we hit the issue of live updating. On match day it is of course highly desirable to get live updates (something like 'push'). As the mobile application is HTML5 based, websockets are the obvious solution - except that they are not supported by every browser. We figured we'd provide websockets where available and try to degrade gracefully to long polling or the CORS method if necessary.

With respect to the actual live updates, what we essentially wanted to do is to push the updates to the client as soon as we stored them in the local database. This screams for an event based, non-blocking solution, so we chose zeromq for the messaging and gevent with gevent-websocket for the non-blocking websocket part. Some preliminary testing shows that actually does work as a broadcast server. More testing is necessary, though.

With websockets we are running into problems with some browsers. Testing on desktop machines, only Opera 11 supports version 7 of the websocket protocol. Firefox 7 and Chrome are already at version 8 of the protocol. The gevent-websocket library has not yet been updated to support version 8. The author is actively working on it though.

The code is available on github. Check out the mongo branch. This will be merged into master at some stage but I'm not really up to speed with git at all and I'd rather invest time in getting the application done than in having a super clean git repository.

Freitag, 26. November 2010

OpenId login with web.py fast easy simple example

#!/usr/bin/env python
import web
from web import webopenid
urls = (
'/', 'index',
'/openid', 'webopenid.host',
)

app = web.application(urls,globals())

def form(openid_loc):
  oid = status()
  if oid:
    return '''
<form action="%s" method="post">

<img alt="OpenID" src="http://openid.net/login-bg.gif"
/>
<b>%s</b>
<input name="action" type="hidden" value="logout" />
<input name="return_to" type="hidden" value="%s" />
<button type="submit">log out</button></form>
''' % (openid_loc, oid, web.ctx.fullpath)
  else:
    return '''
<form action="%s" method="post">
<input name="openid" style="background:
url("http://openid.net/login-bg.gif")
no-repeat scroll 0% 0% transparent;
padding-left: 18px;" type="text" value="" />
<input name="return_to" type="hidden" value="%s"
/>
<button type="submit">log in</button></form>
''' % (openid_loc, web.ctx.fullpath)

class index:
  def GET(self):
    oid = webopenid.status()
    if not oid:
      return 'please log in: ' + \
        webopenid.form('/openid')
    else:
      return 'you are logged in as:' + \
              webopenid.form('/openid')

if __name__ == '__main__':
  app.run()